How can one avoid or eliminate this suffocating weed?
1) Amend your soil and fill your garden with healthy strong plants.
2) Dig down and dig out the root (often 12 "deep).
3) Cut back/Prune repeatedly to ground level to weaken and eventually kill.
4) Pull out and remove before flowering and seeding that spreads then to others' plots.
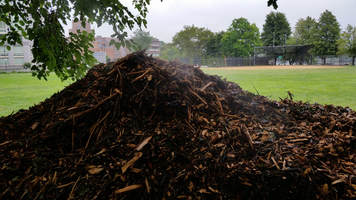
5) Another successful strategy is to mulch the area after weeding by laying down 5-6 sheets of overlapping newspaper or cardboard over all bare soil, and then cover with 3” of ramial wood chips.
6) Please try to trash all bindweed trimmings and avoid placing them in the compost bin. However, our compost piles do also heat up to 140 degrees Farhenheit to kill any possible weed reproduction.
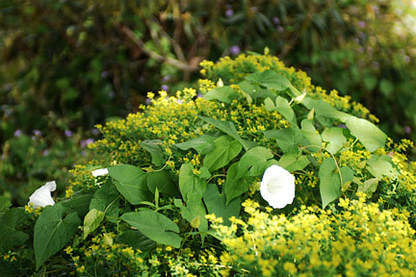
RIGC member, Karen Lee, has prepared her own bindweed publication with excellent pictures of varied stages of growth for this plant, which can be downloaded below.
This link provides another bindweed discussion from an organic gardening blog with pictures of field bindweed; and this link will take you to a clear explanation of hedge bindweed from the RHS in England, but please be reminded that at RIGC, we keep our methods natural and do not allow pesticides that damage the environment and our health long term.
If one weeding nightmare is not enough for you, beware, there is an even worse weed that appears only on a small western edge of the garden because it spreads from an area in the DEP site: Japanese knotweed.
1) Amend your soil and fill your garden with healthy strong plants.
2) Dig down and dig out the root (often 12 "deep).
3) Cut back/Prune repeatedly to ground level to weaken and eventually kill.
4) Pull out and remove before flowering and seeding that spreads then to others' plots.
5) Another successful strategy is to mulch the area after weeding by laying down 5-6 sheets of overlapping newspaper or cardboard over all bare soil, and then cover with 3” of ramial wood chips.
6) Please try to trash all bindweed trimmings and avoid placing them in the compost bin. However, our compost piles do also heat up to 140 degrees Farhenheit to kill any possible weed reproduction.
RIGC member, Karen Lee, has prepared her own bindweed publication with excellent pictures of varied stages of growth for this plant, which can be downloaded below.
This link provides another bindweed discussion from an organic gardening blog with pictures of field bindweed; and this link will take you to a clear explanation of hedge bindweed from the RHS in England, but please be reminded that at RIGC, we keep our methods natural and do not allow pesticides that damage the environment and our health long term.
If one weeding nightmare is not enough for you, beware, there is an even worse weed that appears only on a small western edge of the garden because it spreads from an area in the DEP site: Japanese knotweed.
| bindweed_5.31.17 by K Lee.pdf |

 RSS Feed